
Wear OS apps with Flutter (4/4): Publishing & Getting Approved on the Play Store
Learn how to publish a Wear OS app in the Google Play Console and check out tips on passing the approval process, including setting up a splash screen.

Check out part 1 for an introduction to Wear OS and common design guidelines, part 2 to setup and install your first Wear OS app, and part 3 to implement Platform Channels for custom native functionality!
Publishing
In the Play Store Console, we need to add 'Wear OS' as a form factor of our app – until we do this, there will be no way to actually upload Wear OS screenshots or the actual Wear OS app! To do this, go to the "Test and Release" > "Advanced Settings" section from the left-navbar. On this page there will be a "Form factors" tab, from which you can choose "Add form factor" and choose Wear OS:
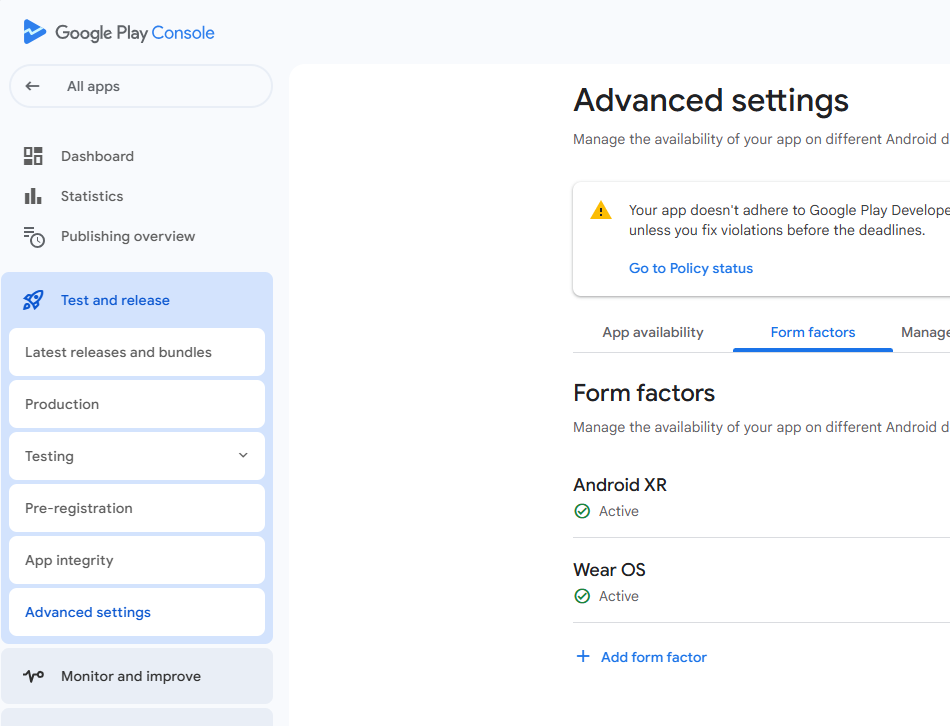
After this, you will also need to enrol and accept the Wear OS program conditions, which should appear after selecting the form factor.
Once all that's done, publishing a Wear OS app is just like any other Android app: go to "Test and Release", choose the appropriate track (e.g., "Production") and click "Create new release" (make sure you've chosen "Wear OS only" next to the button):

From here, you can upload an App Bundle which you must first build using flutter build appbundle and continue the steps to submit for review. Finally, you'll see a "Changed in review" screen like this:
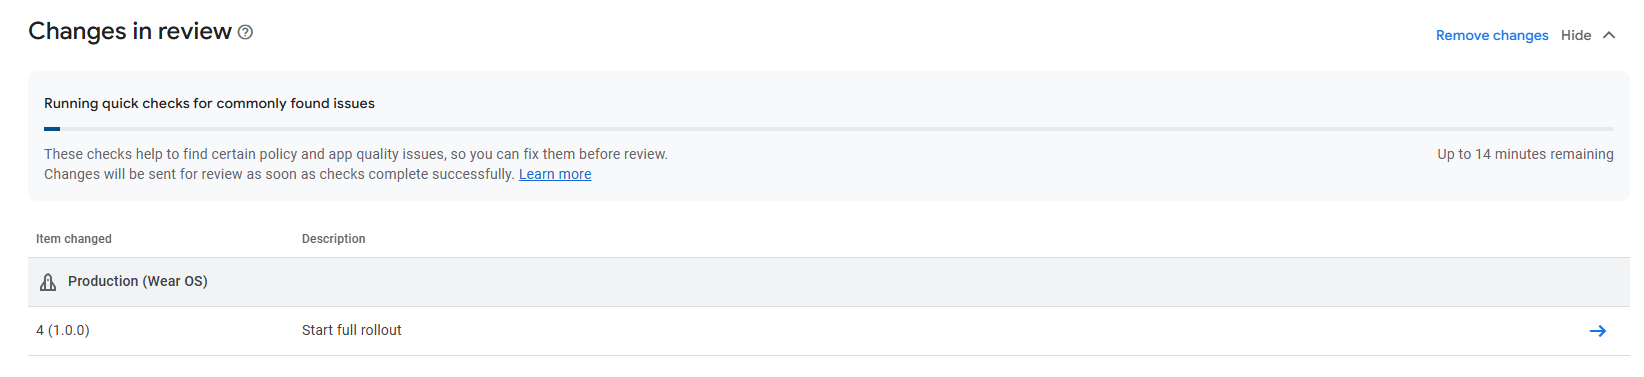
The Google Play Console will run some automated checks to find 'common' issues that can be fixed before sending for manual review. This could potentially save days of review time if there's something they detect as being obviously wrong. However, I found it didn't quite detect everything you might expect would be easily identifiable (see below for more details).
Getting approved
There are some relatively strict review guidelines for Wear OS apps which you need to satisfy before your app can be approved and published for end-users. I share some of the key ones that caught me out in this post.
Rejection #1: Play Store listing
Your play listing description doesn't mention Wear OS.
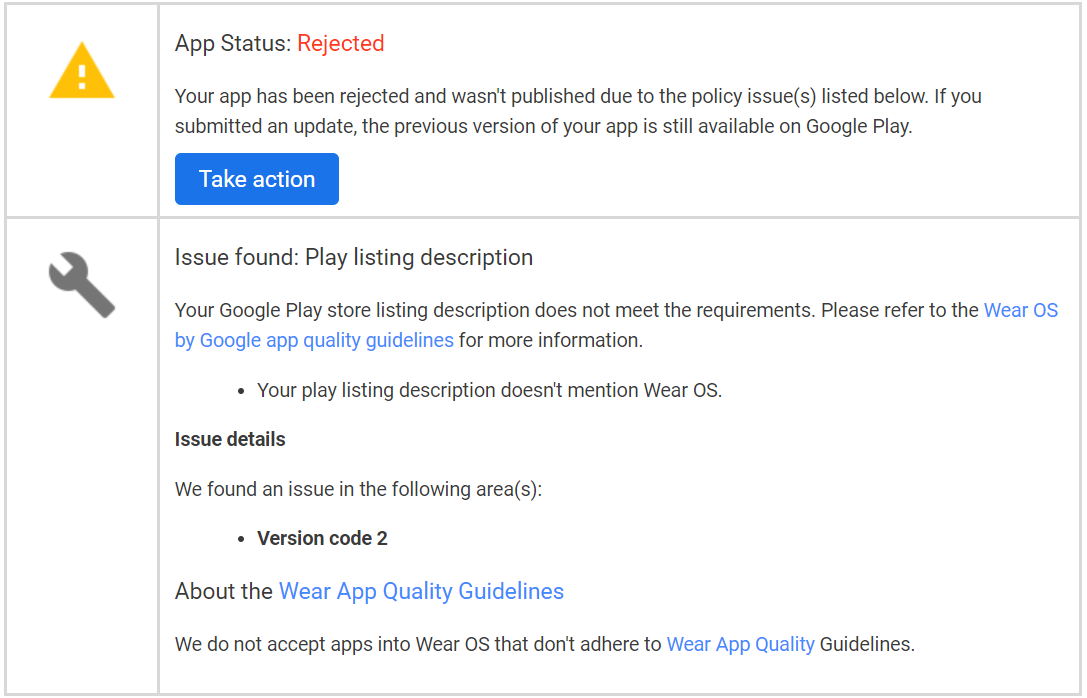
You must mention "Wear OS" in your Play Store listing's description. Not "WearOS", not "Android Wear' – otherwise, your app will likely be rejected and you'll have to go through the review process (which took 2-5 days each time for me!).
The Google Play Console does have a series of automated checks they perform before sending it off for human review, so it seems like something that could easily be automated, but it wasn't in my case!
Rejection #2: Custom font sizes
Your app must conform to the font size set by the user in System Settings. If the user selects a larger font size, ensure that text and controls are not cut off by screen edges.
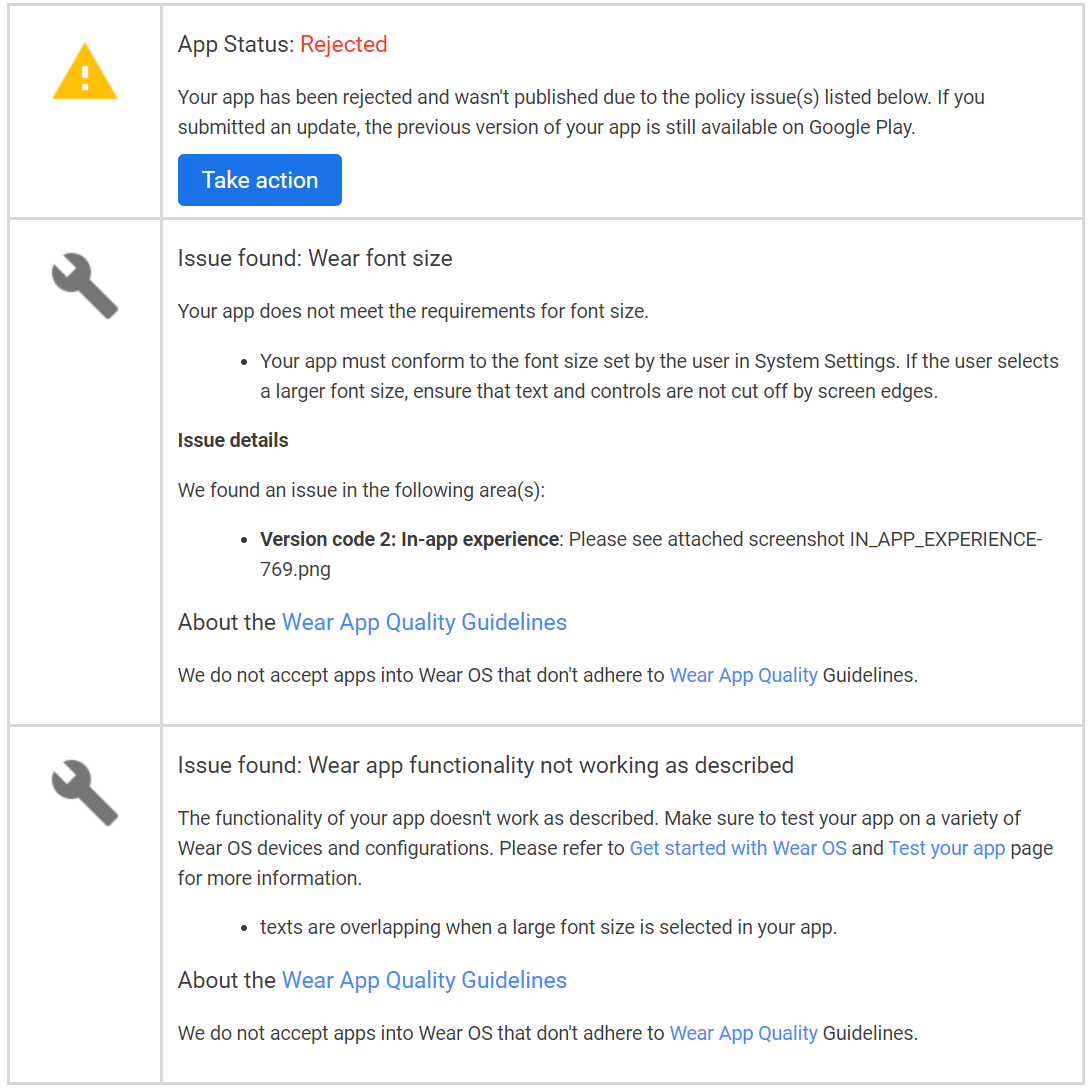
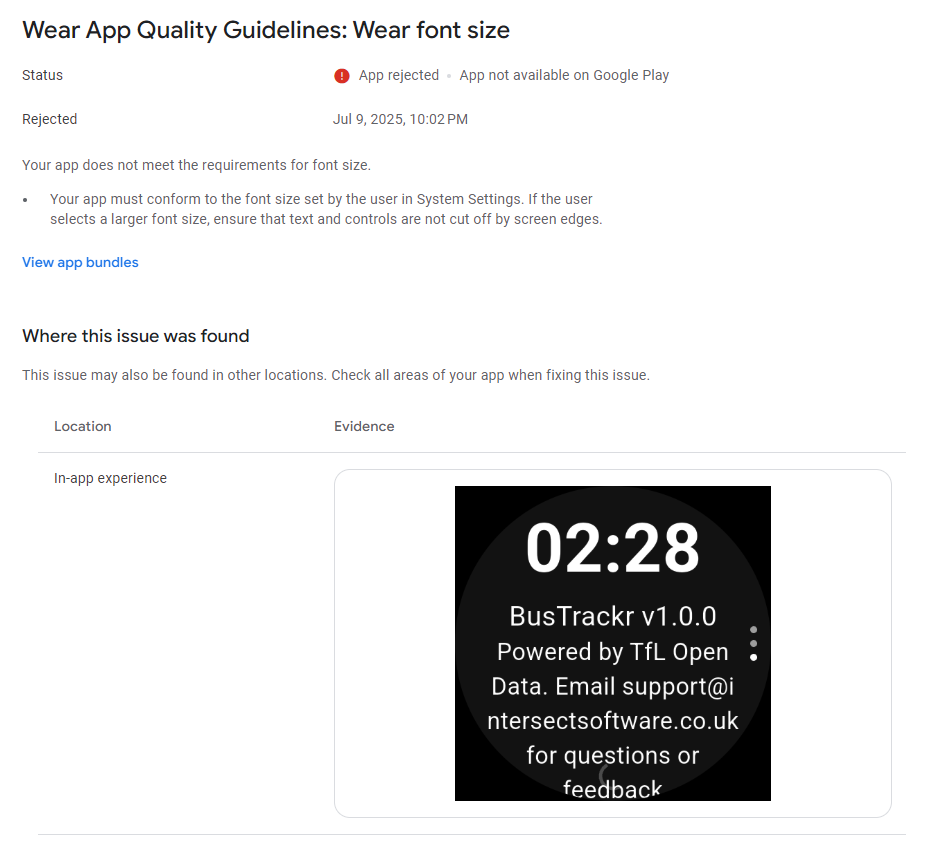
You must respect and adjust according to the font size set on the device. I found this tricky to solve initially, because it was physically impossible to show the same content when the font is larger because everything takes up so much more space!
In the end, I had to come to terms with showing less information on some screen sizes/font sizes.
Screen sizes
Another useful guideline to call out is the screen size requirement. These days, it's already quite common for developers to test their apps on different devices and screen sizes (e.g., in web development, but even in Android app development it's becoming more important with different phones having different constraints like notches).
The same goes for a Wear OS app, but is perhaps more important because the screen sizes are already so small! At a minimum, you should aim to test your app and UI fully on the 2 Wear OS emulators supported by Google: "Wear OS small round 1.2 inch (192dp)" and "Wear OS large round 1.39 inch (227dp)". It could also be useful to try on square devices (although, from what I've seen, it seems most modern Wear OS devices end up being circular).
Splash screen
Your app must have a splash screen. The display requirements are also quite specific: "Use a black window background with the app icon. The app icon must be a 48x48dp circular icon that is positioned in the center of the watch face".
To set up a working splash screen, I used the flutter_native_splash package and set up my config in pubspec.yaml as follows.
flutter_native_splash:
  color: "#000000" # Background color of the splash screen
  image: assets/icon/icon.png # Path to your logo or splash image
  android: true # Enable splash screen for Android
  android_gravity: center # Position of the image on Android (center, bottom, etc.)
  fullscreen: true # Enable full-screen mode (removes the status bar)
Then, you can run dart run flutter_native_splash:create.
I also had to add the following to MainActivity.kt:
import androidx.core.splashscreen.SplashScreen
import androidx.core.splashscreen.SplashScreen.Companion.installSplashScreen
...
override fun onCreate(savedInstanceState: android.os.Bundle?) {
    installSplashScreen()
    super.onCreate(savedInstanceState)
}
and the following to android/app/build.gradle.kts:
dependencies {
    ...
    implementation("androidx.core:core-splashscreen:1.2.0-beta02")
}
After the above configurations, my splash screen loaded successfully!