Wear OS apps with Flutter (2/4): Setting up, designing circular UIs & running on an emulator/device
Learn how to set up a Flutter app for Wear OS, improve the layout on circular screens, and run it on an emulator and physical smartwatch.

Check out part 1 for an introduction to Wear OS and common design guidelines!
A Wear OS app is just a 'normal' Android app (e.g., a .APK file), but with access to some additional SDKs and functionality specific to the watch hardware.
This is helpful because it means most of the time, you can follow typical Android instructions, including setting up an initial app!
Setting up a template app
Run flutter create wear_os_app in your terminal, or use the Flutter: New Project command in VS Code (Ctrl/Cmd+Shift+P)
This will create a boilerplate 'counter' app in Flutter called wear_os_app. Now we just need to configure a setting to define our Wear OS app as a standalone app: edit the manifest file at android\app\src\main\AndroidManifest.xml and insert the following <meta-data> block into the existing <application> block:
<application>
  ...
  <meta-data
    android:name="com.google.android.wearable.standalone"
    android:value="true"
    />
  ...
</application>
You can also optionally install some packages that have been created for Wear OS in Flutter specifically. For example, wear_plus exposes new widgets called AmbientMode and WatchShape that let you detect whether the device is in ambient mode and differentiate between circular/square frames.
Running the app on an Emulator
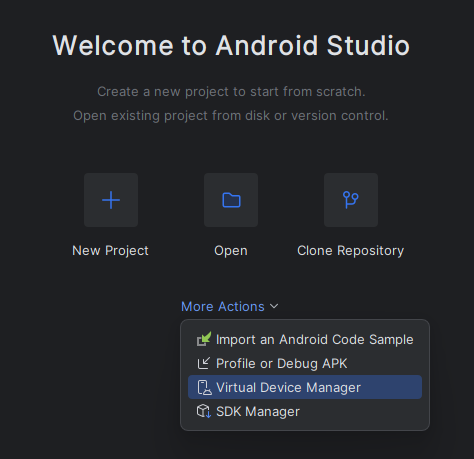
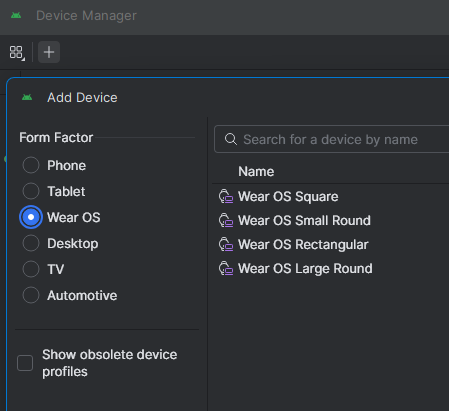
We can already run this as a Wear OS App in an Emulator. First, we need to create a Wear OS device emulator in the Android Device Manager: open Android Studio, click "More Actions" > "Virtual Device Manager" > "+" > choose "Wear OS" Form Factor.
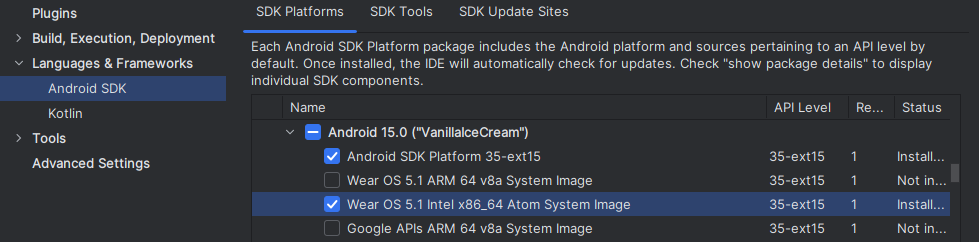
Note: if you can't see the "Wear OS" form factor, make sure you are running the "Android Studio Meerkat Feature Drop" version and in "SDK Manager" (under "More Actions" again), ensure you have installed the "Wear OS 5.1 Intel x86_64 Atom System Image" with API Level 35-ext15 (or the version appropriate for your system architecture e.g., ARM):
Finally, we can start the emulator, and run our app in it with flutter run:
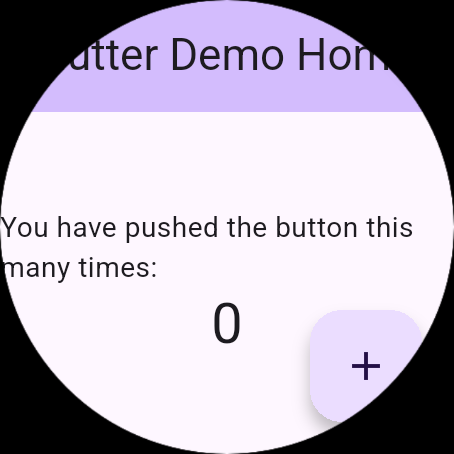
As we can see, there's still a bit of work we need to do to optimise it for a smaller circular display, but it works!
Fixing the layout
We can make some initial minor tweaks to make this look better on a smartwatch:
- Removing the
AppBar. The default counter app comes with aScaffoldandappBarproperty (which defines the "Flutter Demo Home Page" we see clipped off in the image above). Due to the limited space on smartwatches, we don't usually see this kind of UI element in most apps, and should usually be safe to remove. - Adding padding. On circular devices, the screen is actually clipped around the circumference, which means some content ends up being hidden! Whilst there are some clever methods of wrapping content within a circular container (e.g., see this great Stack Overflow answer: Wrapping text inside a circle (Flutter)), I found that for simpler apps, padding can get you quite far, especially for primarily centered content. For example, wrapping all your content in a
Paddingwith a padding ofEdgeInsets.fromLTRB(10, 5, 10, 5)and aCenterchild avoids needing to touch the borders in most cases! - Changing the FAB (floating action button). By default, the FAB is placed at the bottom right, but the placement and sizing can easily be tweaked with
floatingActionButtonLocation. I found that usingFloatingActionButtonLocation.miniCenterDockedworked quite well.
What these changes might look like in code:
@override
Widget build(BuildContext context) {
return Scaffold(
body: Padding(
padding: EdgeInsets.fromLTRB(10, 5, 10, 5),
child: Center(
child: Column(
mainAxisAlignment: MainAxisAlignment.center,
children: <Widget>[
const Text(
'You have pushed the button this many times:',
textAlign: TextAlign.center,
),
Text(
'$_counter',
style: Theme.of(context).textTheme.headlineMedium,
),
],
),
),
),
floatingActionButton: FloatingActionButton(
onPressed: _incrementCounter,
tooltip: 'Increment',
mini: true,
child: const Icon(Icons.add),
),
floatingActionButtonLocation:
FloatingActionButtonLocation.miniCenterDocked,
);
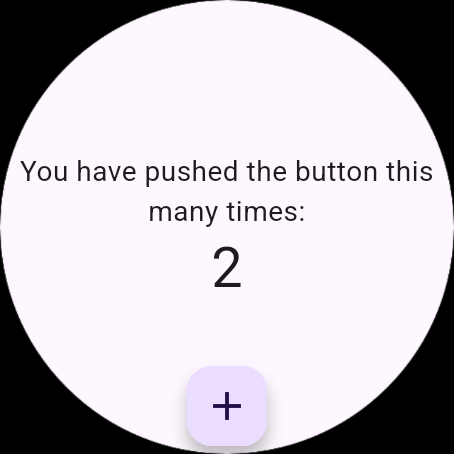
}With just these tweaks we can get to layout that looks like below:
Running the app on an actual Wear OS Smartwatch
If you have a physical smartwatch, it's also easy to run the app on that too! With usual Android phone apps, the most common and straightforward way is to connect a phone via USB. That's not an option for (most) Wear OS devices, but they do support Wireless Debugging (as do most Android phones too).
Enabling 'developer mode' on Wear OS watches is similar to how we do it on Android phones: go to Settings > System (or Other) > About (watch) > Versions (or 'Other version info'), and tap on the 'Build number' seven times. Once done, you'll see a toast message confirming developer mode is activated.
You can now find these settings in Settings > System (or Other) > Developer Options. From here, you can enable "Wireless debugging" (this requires your watch to be connected to a Wi-Fi network – in my experience, toggling "wireless debugging" on will auto-connect to a saved Wi-Fi network in a few seconds):
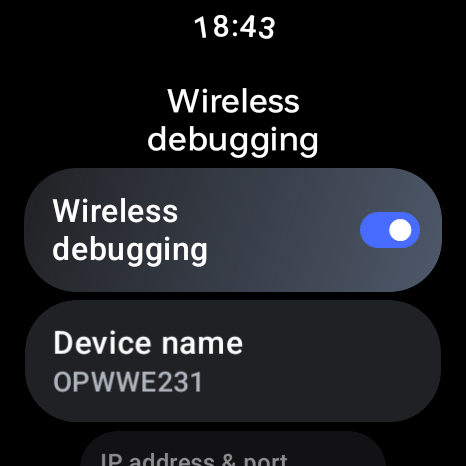
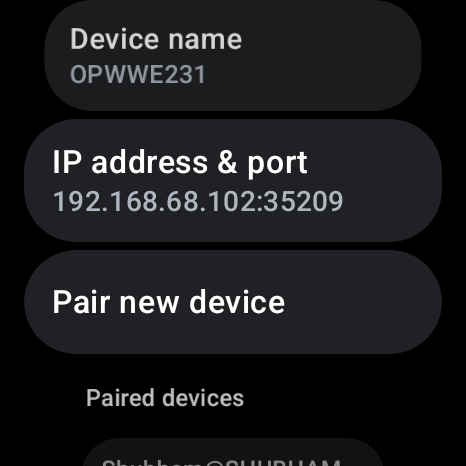
You'll be shown your watch's local IP address and a port to connect to.
If you're connecting a computer for the first time, you'll first need to pair it: tap the "Pair new device" button.
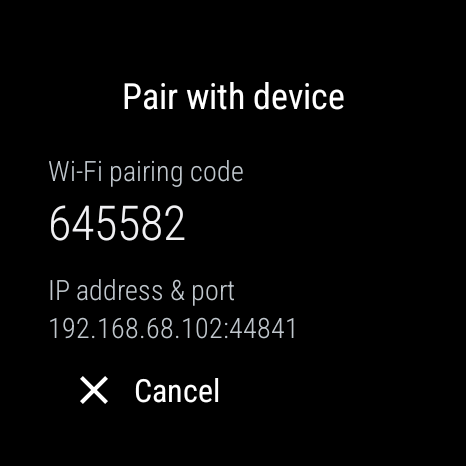
Now, you can pair ADB from your computer (on the same Wi-Fi network) – be sure to change the IP address and port as shown on the "pair with device" screen!
adb pair 192.168.68.102:44841After pairing, or if you've previously paired your computer, you can connect:
adb pair 192.168.68.102:35209Note that this is a different port to the 'pairing' port! It will also change every time you turn Wireless Debugging on!
I'd recommend turning Wireless Debugging off whenever you finish, to conserve battery on your watch.
Finally, to run your new Wear OS Flutter app on your physical watch, you can use flutter run – you may be prompted to choose which device to run the app on, if you have multiple (e.g., the physical one and emulator).
A note about performance
I found my app seemed to be quite slow when I was developing it and testing it like this. It got me quite worried because I wasn't doing anything super intensive, and I wasn't sure how I could optimise it.
But it turns out it was only slow when it was being built in debug mode – building it for release made the app much snappier. I found the slowness in debug mode was much more compared to the slowness you might expect when developing a typical Android phone app and testing it in debug mode, so this is useful to bear in mind!
Towards the end of this blog series, I will explain how we can build apps in release mode, ready for testing and/or publishing to the Play Store.
In the next part, we'll implement a Platform Channel to use native device functionality that may not be supported in typical Flutter packages (e.g., getting device location, or getting user input)!